How to install free Let’s Encrypt SSL on cPanel
Enabling free SSL through Let’s Encrypt is simple.
First things first your domain must ping to our server. If your domain does not resolve to our server Let’s Encrypt will not issue the certificate. If you are using a CDN like Cloudflare make sure to enable SSL in their panel (enabled by default)
If you have DMCA ignored hosting please go down the the second section of this article
Log into cPanel and navigate to SSL/TLS Status
If your SSL is not enabled it will show red check marks. Check the box to enable all your domains + subdomains and then select “Run AutoSSL“
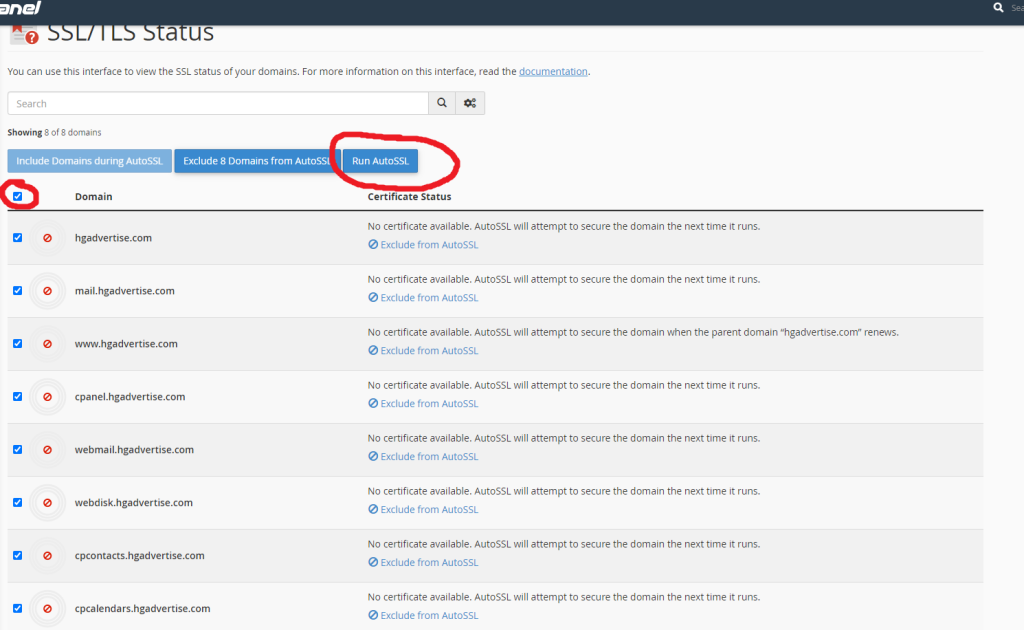
Shortly after refresh the page and if the domain is pointed to our server correctly it will now show as being enabled (green lock box). You may need to clear your cache to get https to show.

That’s it you’re all done. Try opening your website with https. To force HTTPS instead of HTTP follow this guide https://www.hostgnome.com/guides/how-to-force-your-website-to-load-securely-with-https-ssl/
DMCA Ignored cPanel hosting guide:
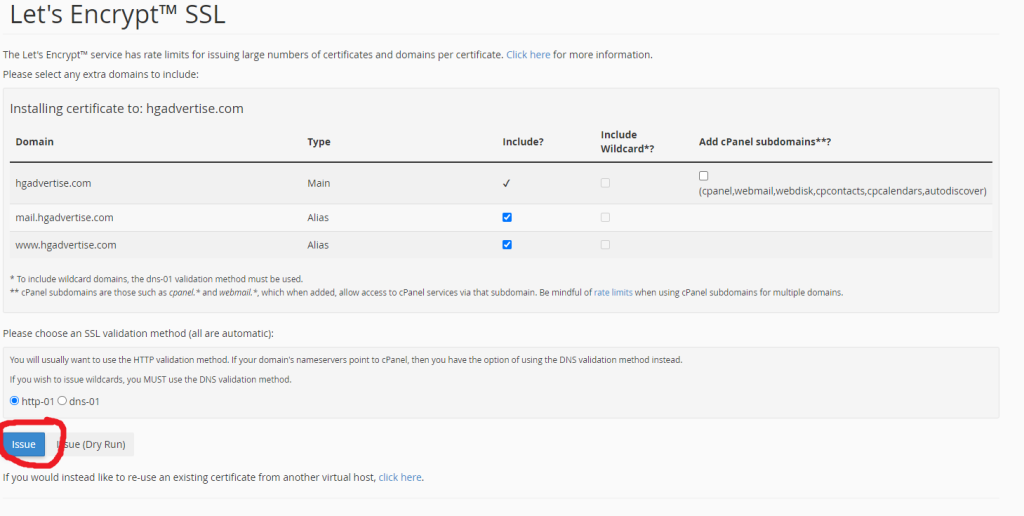
Log into your cPanel account and navigate to Let’s Encrypt™ SSL

Under “Issue a new certificate” select the action Issue for the domain you want the free SSL certificate on

You can keep the default settings or if you wish to add your cPanel subdomains enable those too. Click Issue to add the certificate.
That’s it you’re all done. Try opening your website with https. To force HTTPS instead of HTTP follow this guide https://www.hostgnome.com/guides/how-to-force-your-website-to-load-securely-with-https-ssl/